
How to Make Tracking on Google Tag Manager Easier
Sometimes tracking clicks or form submissions on your website can be tricky.
You might have to dig into the HTML or try to figure out what exactly to track.
The good news is there is a way to make it a lot easier. You can see exactly what people are clicking on your site without touching code by using Google Tag Manager.
Step 1: Add Google Tag Manager to Your Website
The first step is adding Google Tag Manager to your website. You can skip this if you already have it!
How you do this depends on the platform you are using. For example, on Squarespace you can put the GTM code in the header code injection area. Other websites have their own ways but the main idea is the same.

GTM needs to be on every page you want to track.
Step 2: Set Up a Trigger for All Clicks
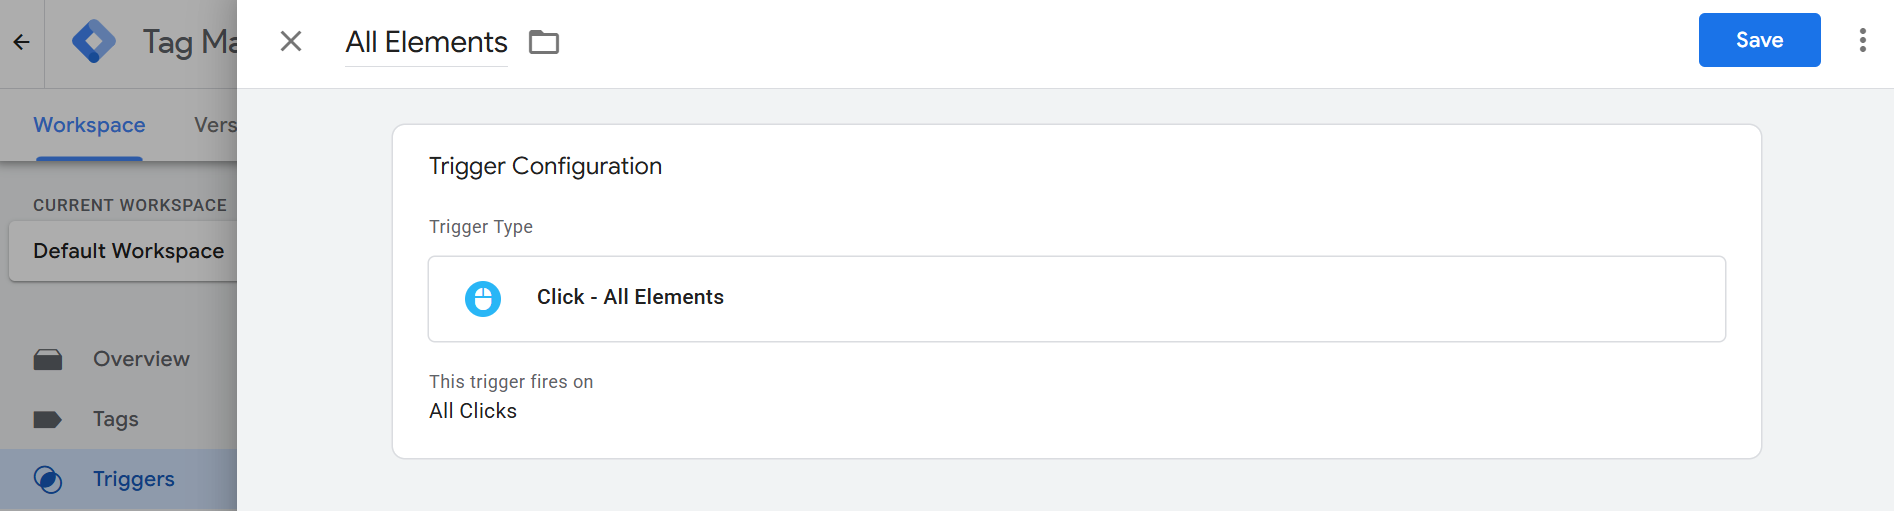
Once GTM is on your site go to Triggers in the dashboard.
Click New and then Trigger Configuration.
Under Click, choose All Elements.
Then select This trigger fires on all clicks.
Name your trigger something simple like All Elements.
Now every click on your site will trigger this. This makes it easier to see what people are clicking on without digging into the HTML.
Step 3: Preview Mode and Checking Clicks
Next, go into Preview mode and load your website. The Tag Assistant will show every click event. For example, if you want to track a button click, just click the button.

Then in the Tag Assistant, look under Variables. You will see things like Click Target or custom events. These are what you can use to track clicks in GA4 or Google Ads.

This method makes it much simpler to track buttons or other elements. After this, you can go further and track form submissions or other interactions but this step makes everything a lot easier.