
How to Create a Google Ads Account from Scratch
You’ve probably seen other businesses running Google Ads and wondered if you should be doing the same.
The good news is setting up a Google Ads account is actually very straightforward. Once it’s done, you’re ready to start promoting your business across Google search, display, and even YouTube.
In this guide, I’ll walk you through exactly how to create a Google Ads account from scratch, based on the current setup process as of 2026.
1. Go to the Google Ads Website and Check Available Offers
The first step is to head over to the Google Ads sign-up page.
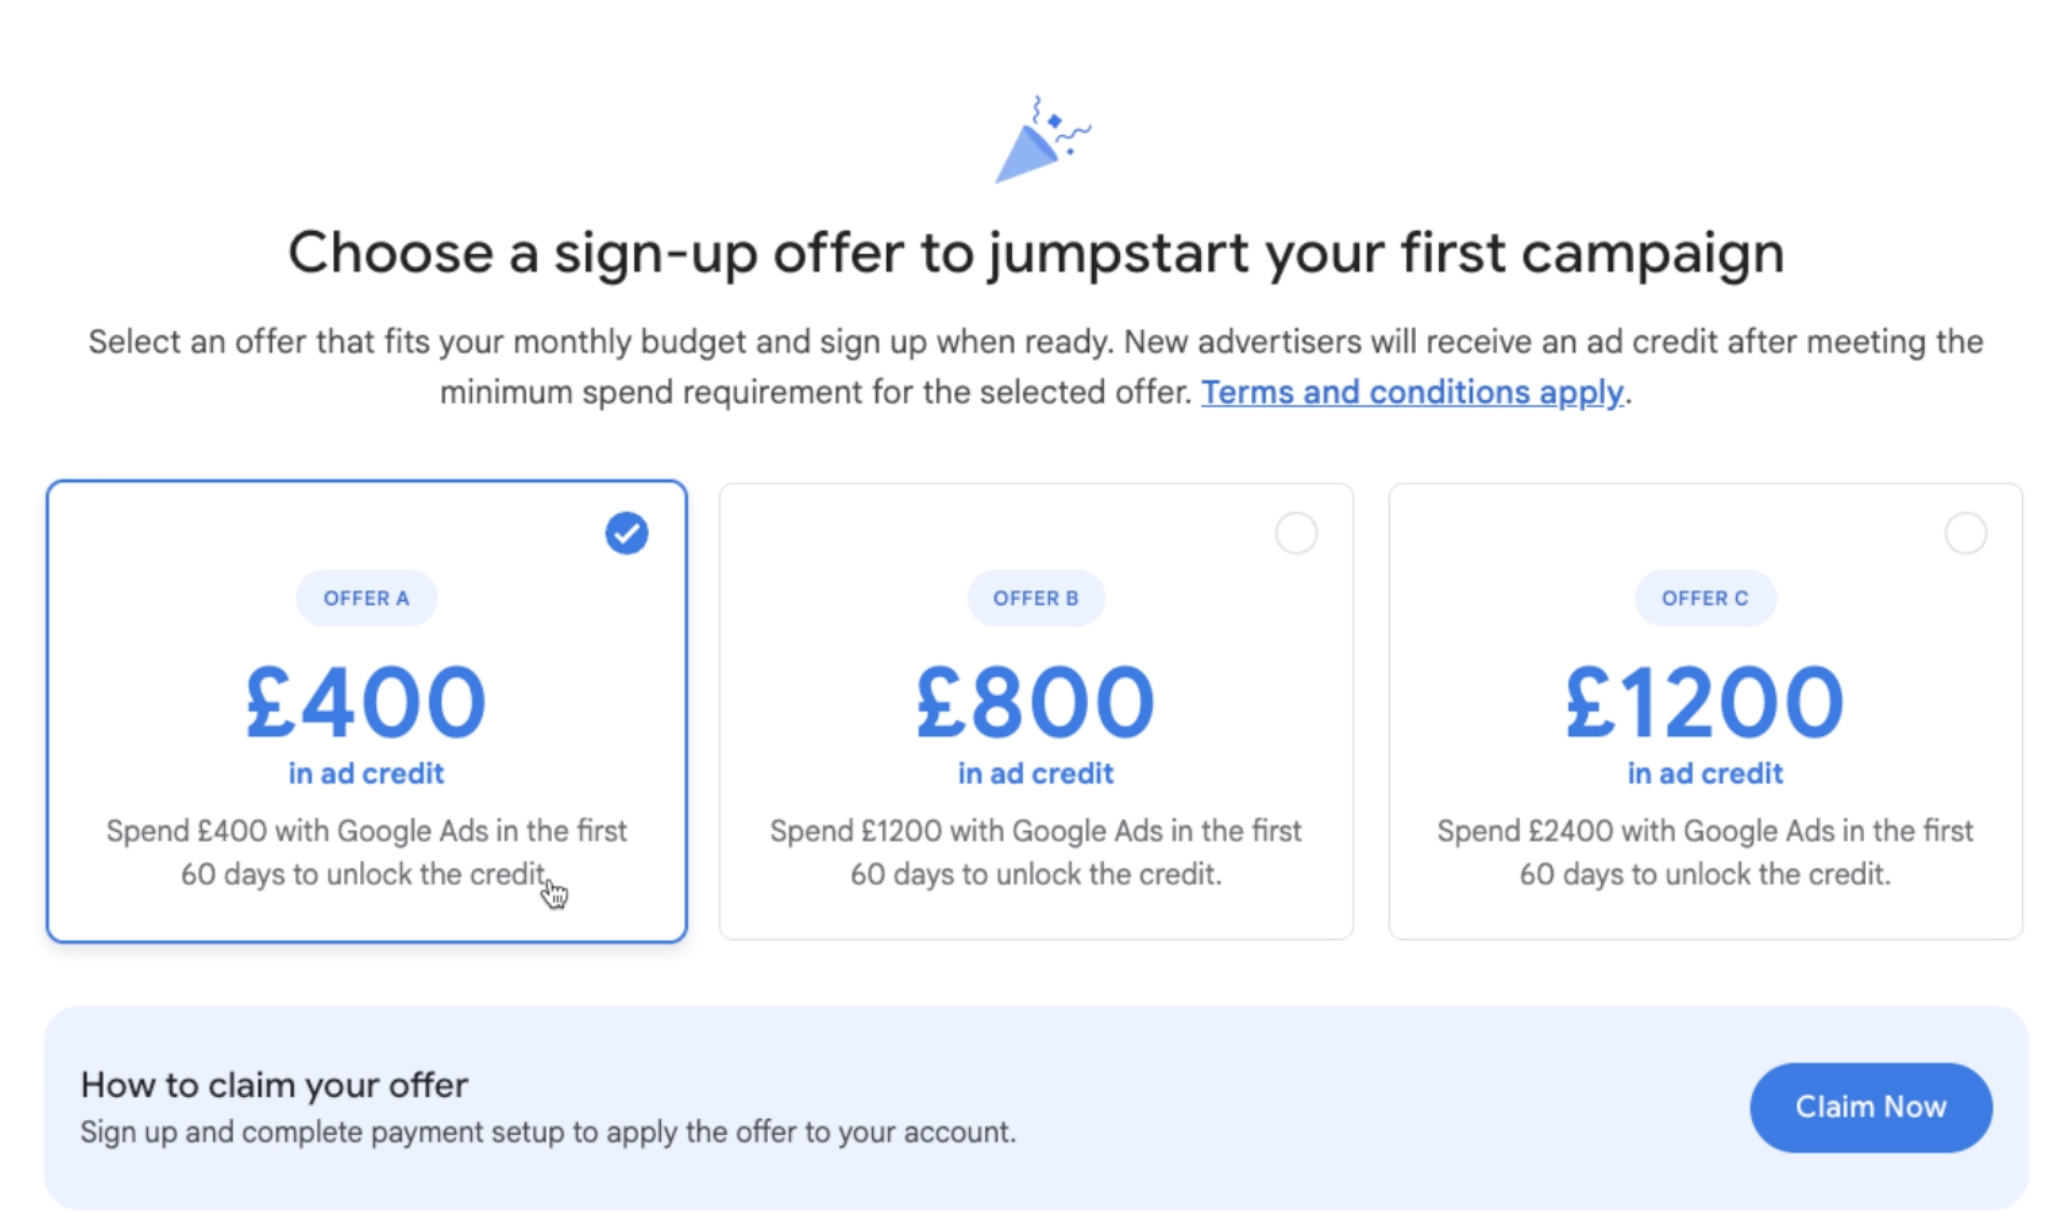
Before jumping straight in, scroll down and take a look at the available promotional offers. These can give you extra ad credit when you spend a certain amount.
When I checked in March 2026, the offers were:
Spend £400 → Get £400 in ad credit
Spend £1,200 → Get £800 in ad credit
Spend £2,400 → Get £1,200 in ad credit
These offers can change, so always check what’s currently available.
My recommendation
If you’re completely new, especially in e-commerce, start small:
Go for the lower spend option
Test performance first
Scale once you know it’s working
Once you’ve chosen, click “Claim now” to begin.
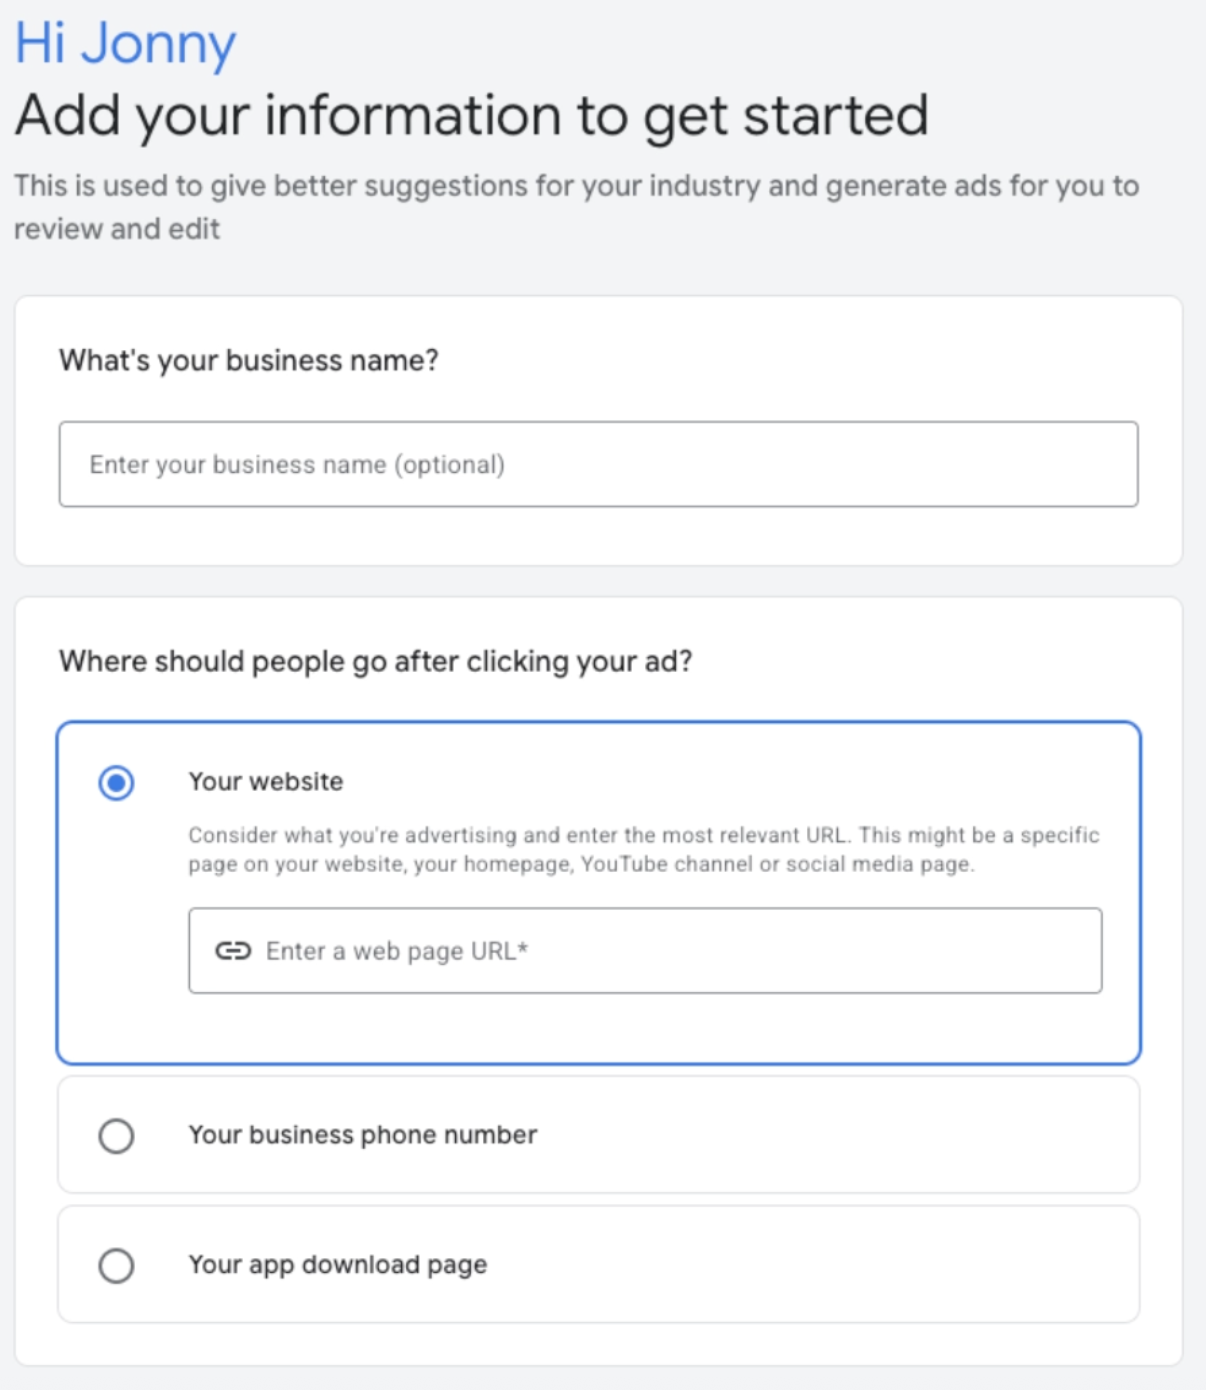
2. Add Your Business Information
Next, you’ll be asked to enter some basic business details.
This includes:
Your business name (this appears in your account)
Your website URL
The URL isn’t hugely important at this stage, but it’s best to enter your main site so Google can pull in relevant data later.
Once done, click Next.
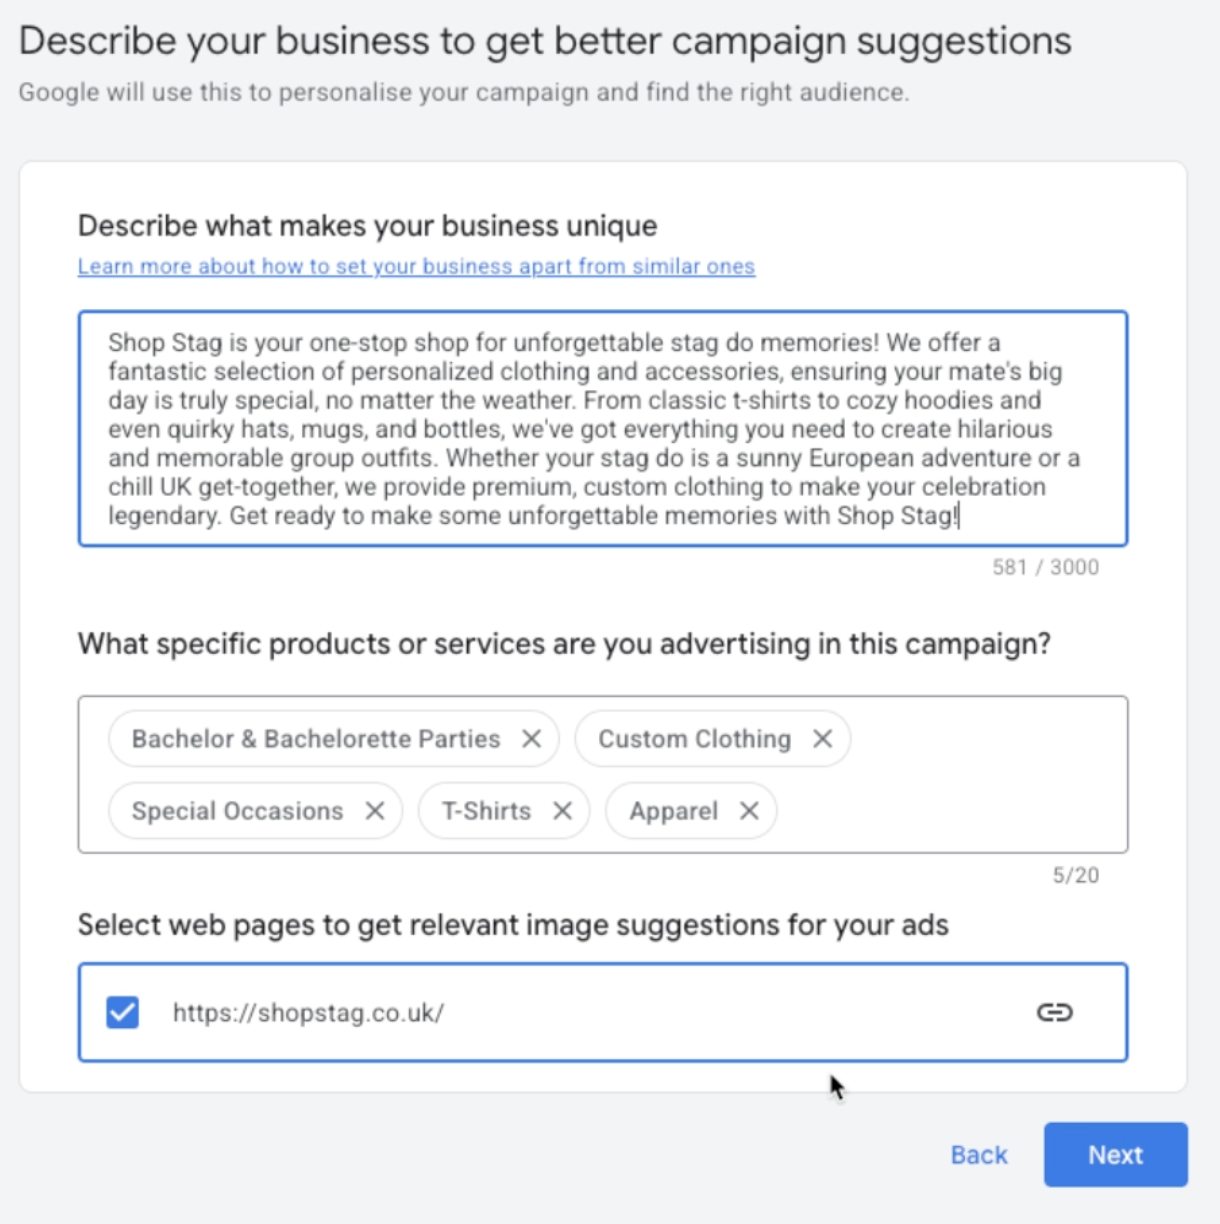
3. Review AI-Generated Business Details
Google will now try to automatically generate:
What makes your business unique
Products or services from your website
This is based on your URL, so it’s not always perfect.
What you should do here:
Double-check everything
Remove anything irrelevant
Make sure it accurately reflects your business
This step matters more than people think, as it can influence early campaign suggestions.
Once you’re happy, click Next.
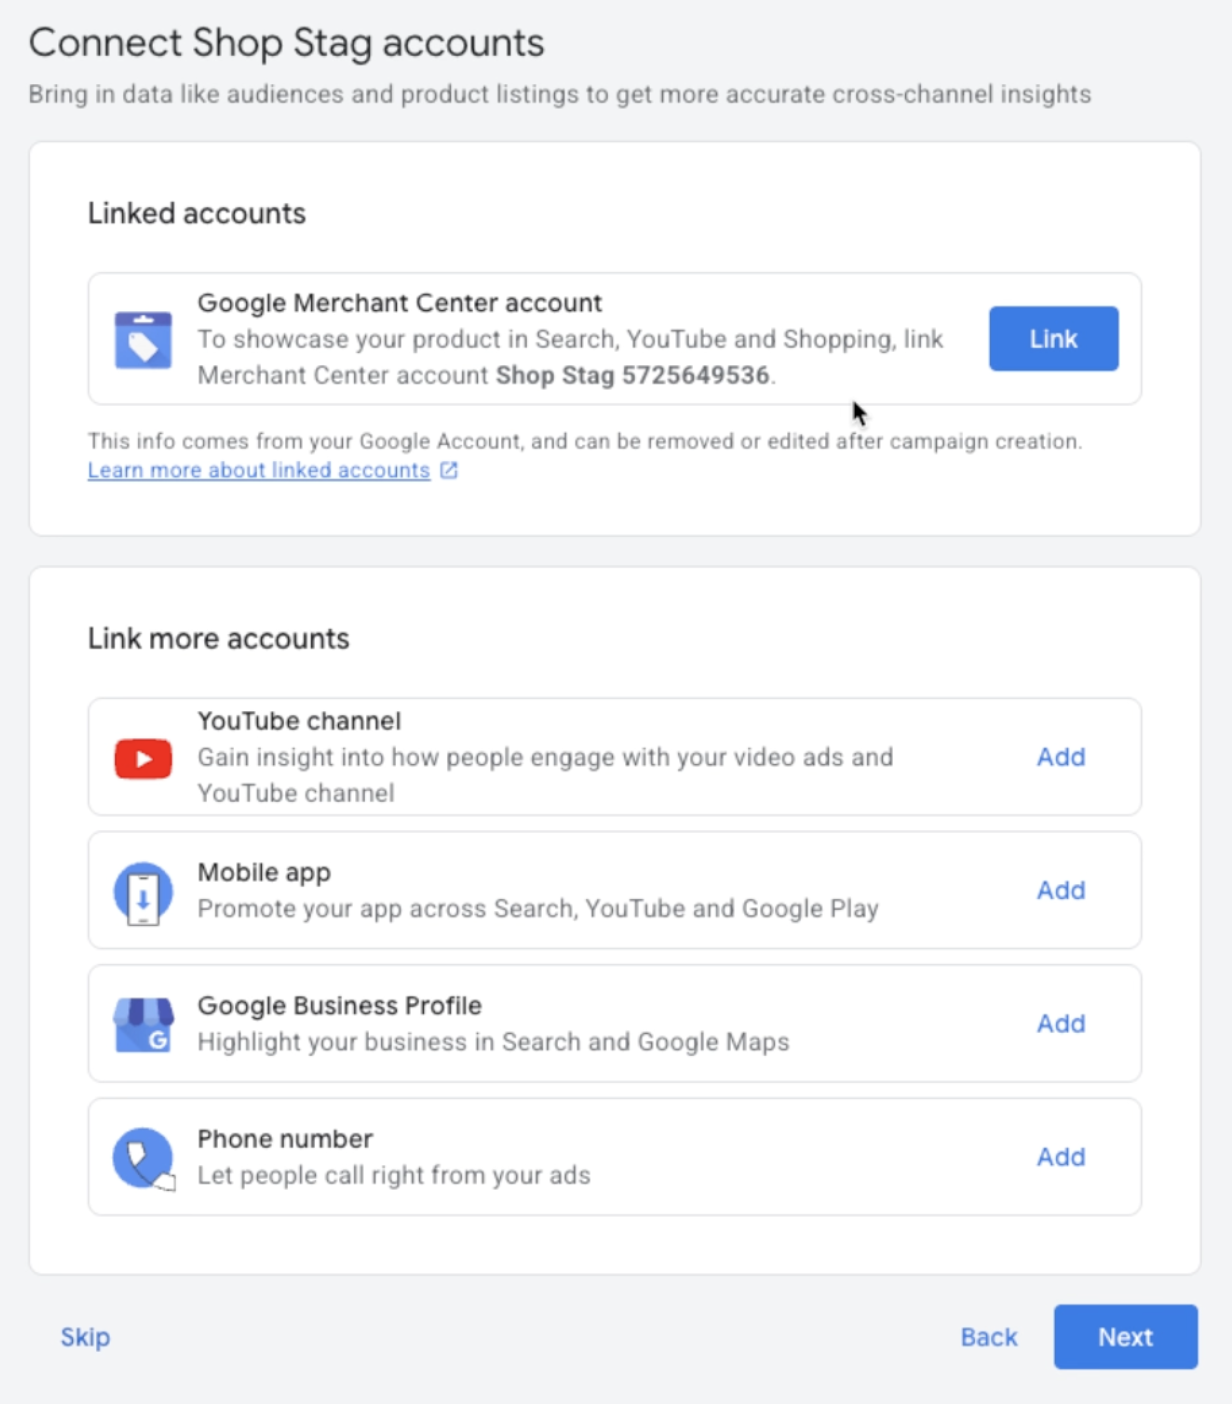
4. Link Your Existing Accounts
You’ll now get the option to connect other Google platforms.
This can include:
Google Business Profile
Merchant Center
YouTube channel
If you already have these set up, I strongly recommend linking them now.
Why?
It improves data sharing
Helps with campaign performance
Saves time later on
It only takes a few clicks, so it’s worth doing properly.
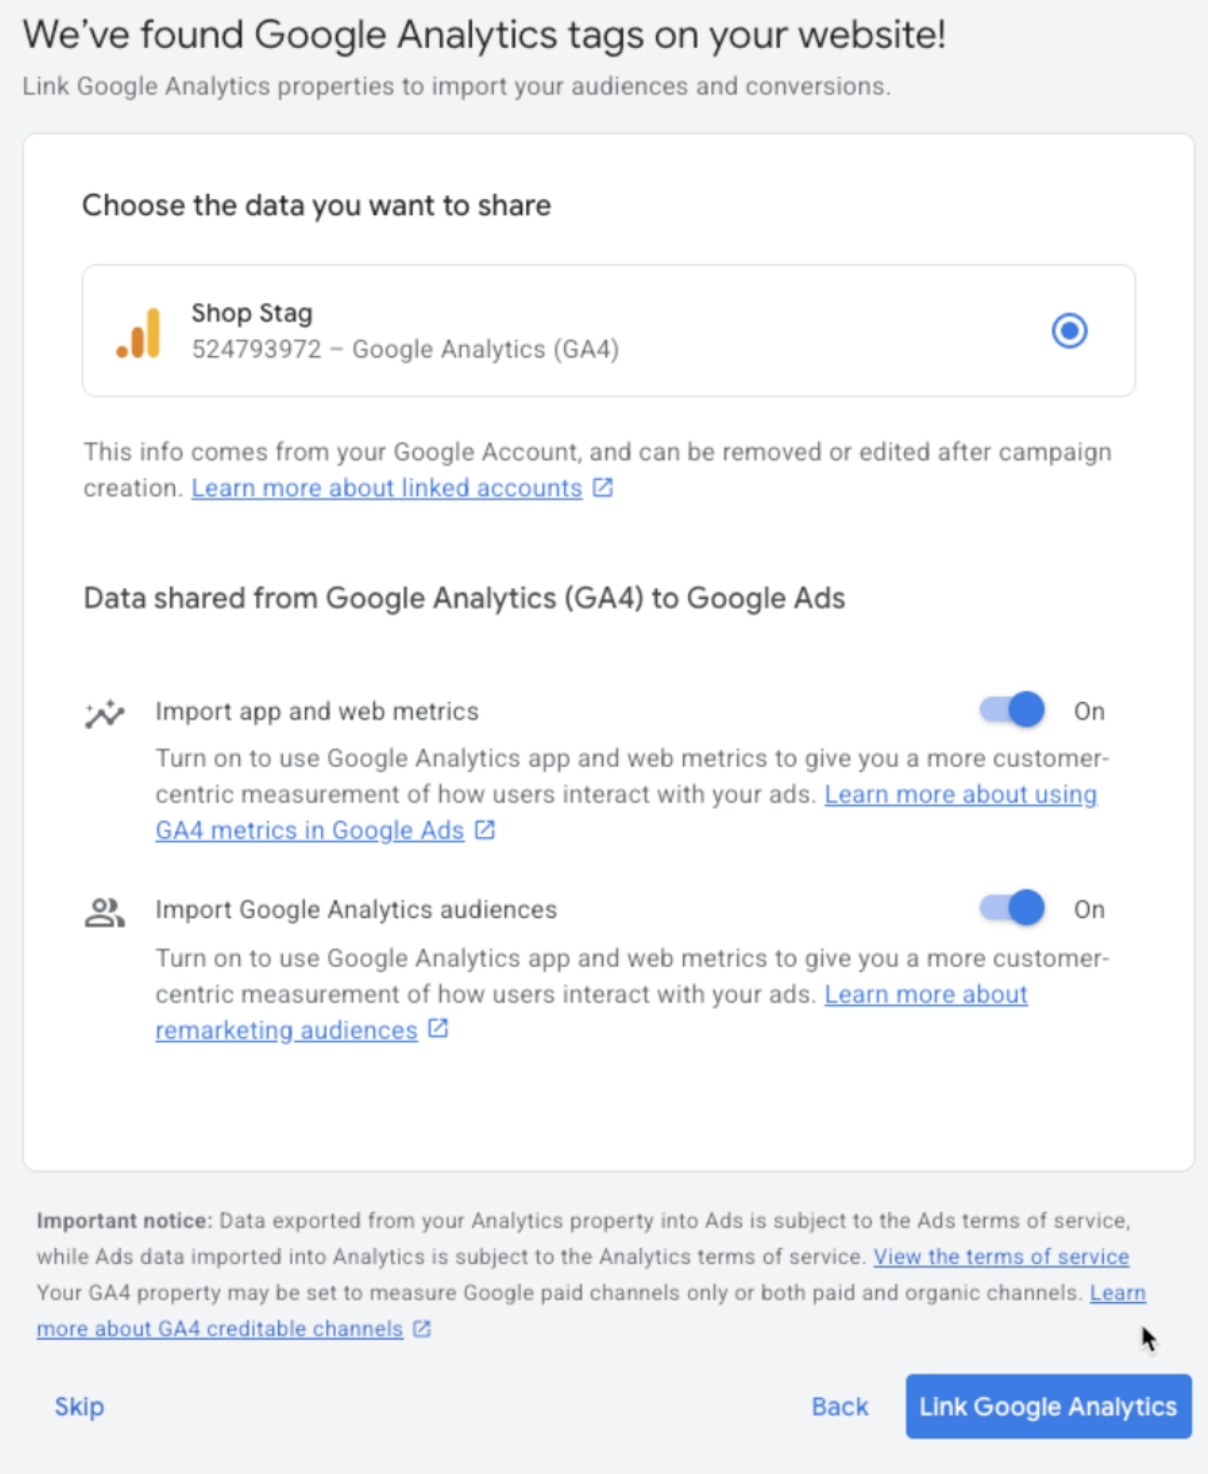
5. Connect Google Analytics (GA4)
Next, you’ll be prompted to connect your Google Analytics account (GA4).
This is an important step.
Sharing data between GA4 and Google Ads allows Google to better understand:
Who your ideal customer is
How users behave on your site
What actions lead to conversions
In my experience
Accounts that are properly linked tend to perform better over time because Google has more data to optimise with.
If you have GA4 set up, connect it here. If not, you can always do it later.
6. Skip Campaign Creation (For Now)
Google will now try to push you into creating your first campaign.
You’ll see options like:
Choose a goal
Select a campaign type
For this guide, we’re only setting up the account.
So:
Click Skip when asked to choose a goal
Click Skip again on campaign type
This avoids rushing into a campaign without proper planning.
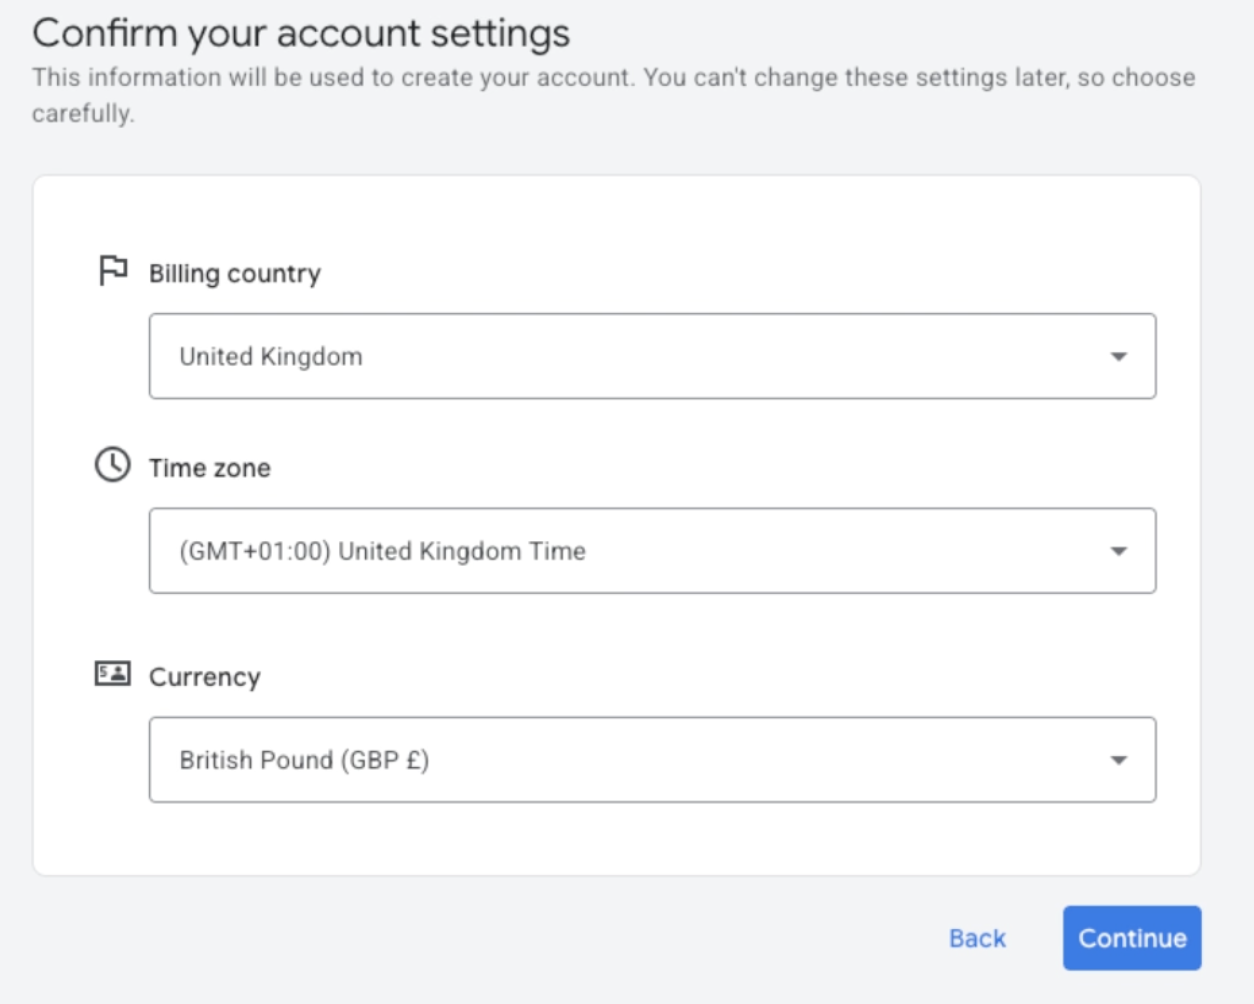
7. Confirm Your Account Settings
Now you’ll set your core account details.
This includes:
Country
Time zone
Currency
Important
These settings cannot be changed later.
Make sure everything is correct before moving forward, especially your currency and time zone.
8. Set Up Billing and Payments
Next is the billing section.
You’ll need to:
Add a debit or credit card
Enter your billing address
Confirm whether you’re a business or individual
Fill everything out accurately to avoid issues later.
Quick tip (based on experience)
You’ll also see an option for Google Ads support via phone or messaging.
I generally recommend selecting No here.
In many cases, their advice leans towards increasing spend rather than improving efficiency.
If you want proper guidance, you’re better off working with a specialist who focuses on ROI rather than just budget increases.
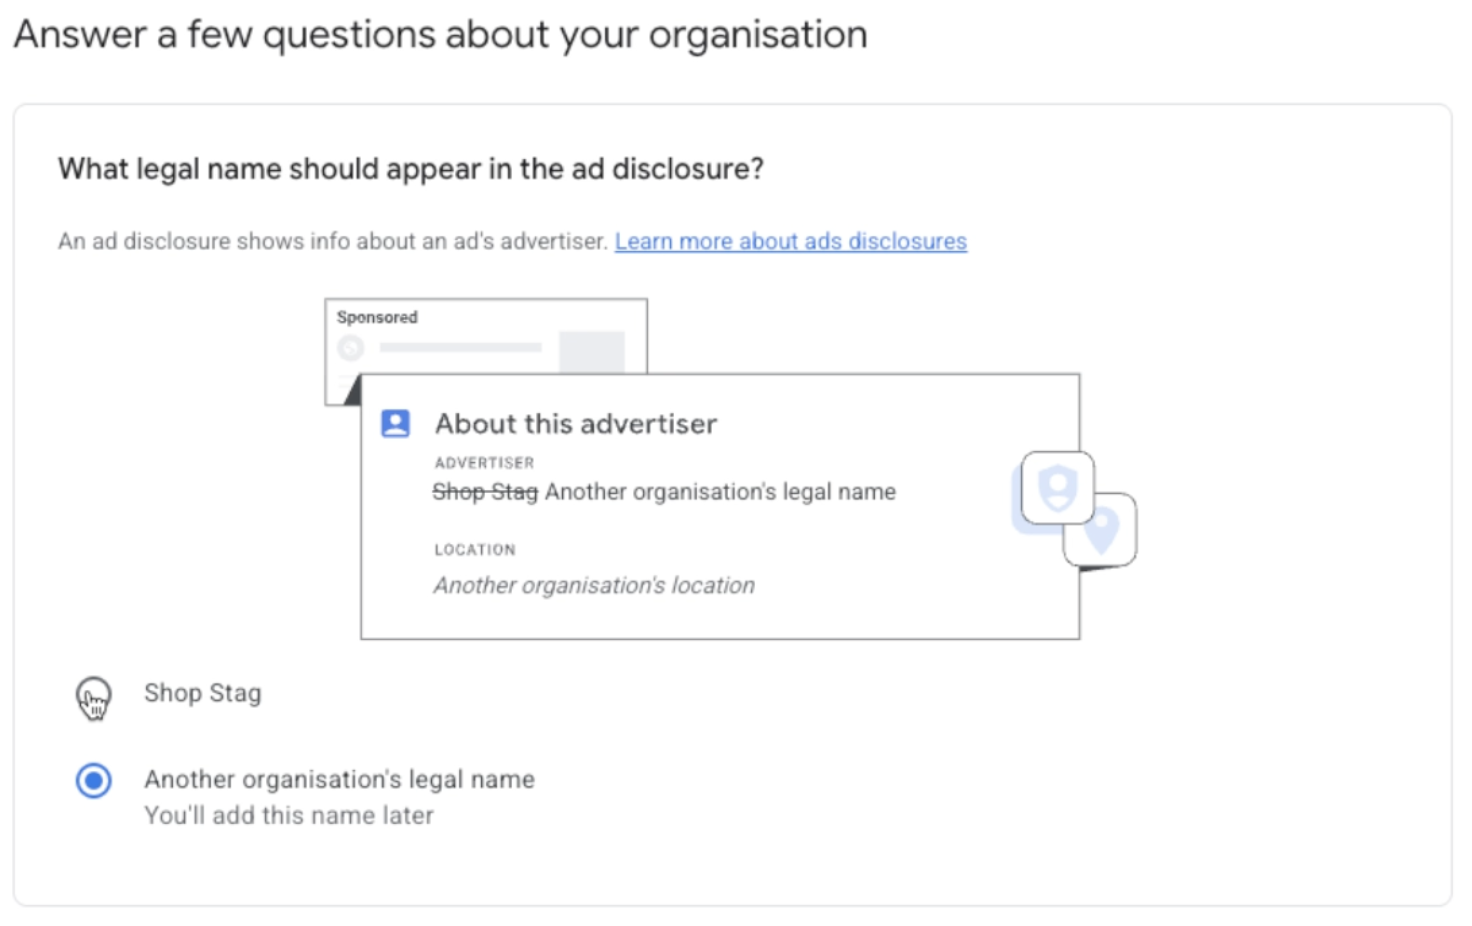
9. Complete Ads Verification and Disclosure
The final step is confirming your advertiser details.
This usually involves:
Setting your legal business name
Choosing how your name appears on ads
Make sure this matches your branding and business details.
Once completed, your account will be fully set up.
What Happens Next?
At this point, your Google Ads account is live.
You can now:
Create campaigns
Set budgets
Start driving traffic
That said, setting up campaigns properly is a completely separate topic and one where mistakes can get expensive quickly.
Conclusion
Creating a Google Ads account is actually one of the easiest parts of running paid advertising.
The key steps are:
Choosing the right offer
Entering accurate business details
Linking relevant accounts
Skipping rushed campaign setup
Setting billing and account preferences correctly
Once that’s done, you’ve got a solid foundation to start advertising properly.
If you're interested in professional PPC management to grow your business, feel free to get in touch via my contact page at jonnyswiftppc.com/contact. I'd be happy to discuss how PPC can work for you.